
Dispatch Tracker (User Guide)
links: https://dashboard.mcjimleather.com/modules/dt
(Scan to be directed to the user guide documentation.)
Overview
The Dispatch Tracker is a web-based application used by guard teams to manage and track the status of store deliveries in real time. It allows guard to:
• View all active delivery checklists and their current progress.
• Scan a checklist QR code to start a new delivery run.
• Update the status of each Transfer Document (TD) as deliveries happen.
• Record failed deliveries with a reason, and re-attempt or cancel them.
Each delivery checklist contains one or more stores. Each store contains one or more Transfer Delivery (TDs), which are the individual delivery records that are tracked.
Getting Started
Accessing the Application
Open a web browser and navigate to the Dispatch Tracker URL provided by your system administrator. Log in with your assigned username and password.
Modules → Dispatch Tracker
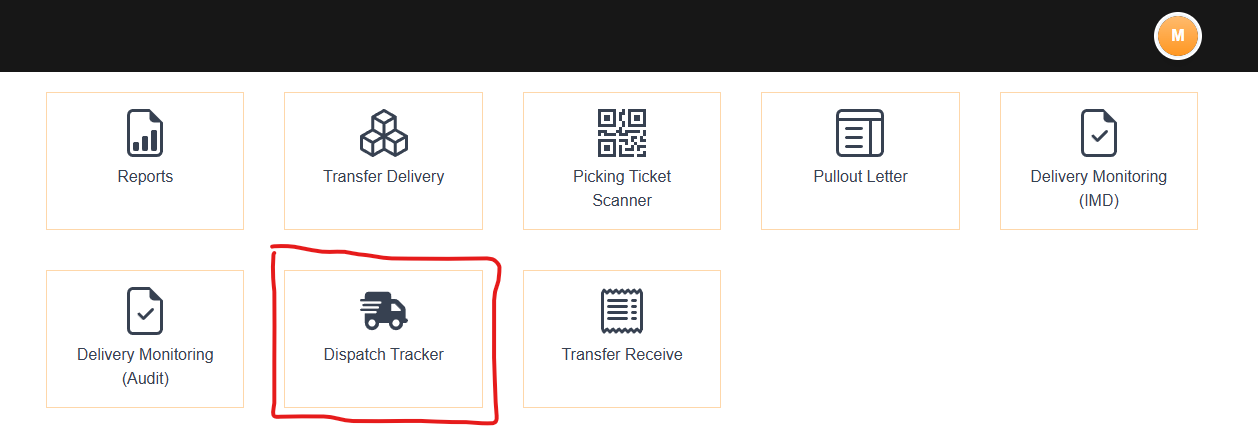
Application Layout
The application has two main tabs at the top of the page:
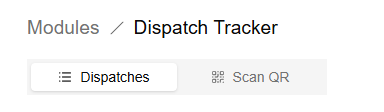
• Dispatches tab: Dispatches — View and manage existing delivery checklists.
• Scan QR tab: Scan QR — Start a new delivery run by scanning or entering a checklist ID.
Dispatches Tab — Viewing Delivery Checklists
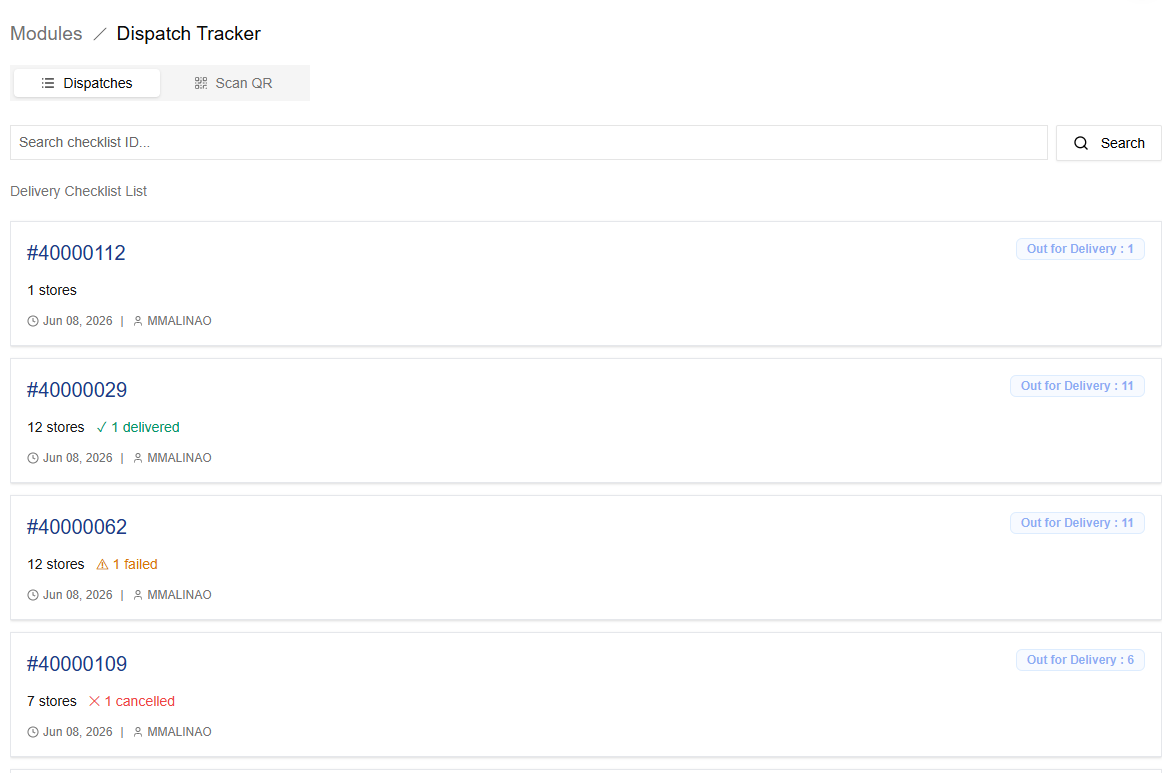
Searching for a Checklist
Use the search bar at the top of the Dispatches tab to find a specific checklist by its ID number.
1. Type the checklist ID into the search field (e.g., 40000112).
2. Press Enter or click the Search button.
3. The list will filter to show only matching checklists.
4. Clear the search field to return to the full list.
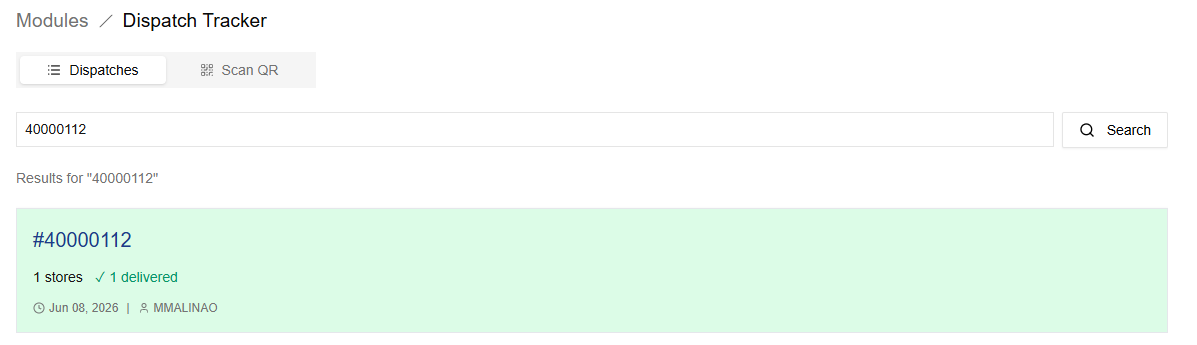
Reading a Checklist Card
Each card in the list represents one delivery checklist. The card shows:
• Checklist ID number (e.g., #40000112) in the top-left.
• An animated “Out for Delivery” badge in the top-right when any stores are actively being delivered.
• A summary line showing total stores and counts per status (e.g., “12 stores ✓ 1 delivered ⚠ 1 failed”).
The date the checklist was created and the user who created it.

Note: A checklist card with a green background indicates that all stores have been successfully delivered, while a red background indicates that the delivery has been cancelled.
Delivery Detail Screen
Click any checklist card to open the Delivery Detail screen. This screen shows all stores in that checklist and lets you update delivery statuses.
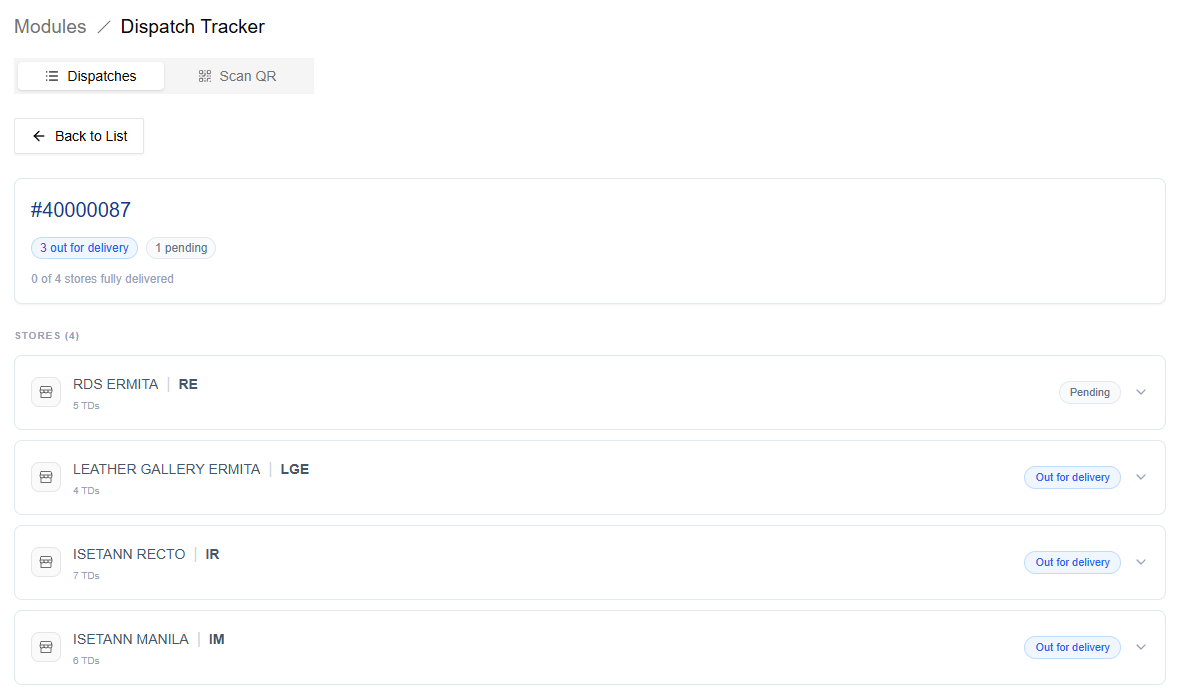
Summary Card
The summary card at the top of the screen shows:
• The checklist ID number.
• Status chips showing how many stores are in each status (e.g., “10 out for delivery”, “1 partial”).

Store List
Below the summary card is the list of stores. Each store row shows:
• The store name and store code.
• How many TDs the store has (e.g., “5 TDs”).
• A status badge for the overall store status.
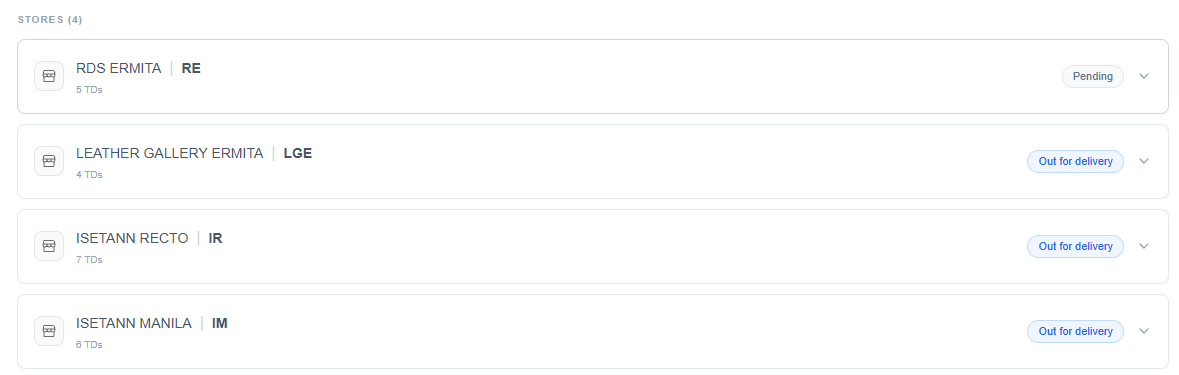
Click a store row to expand it and see the individual TD cards.
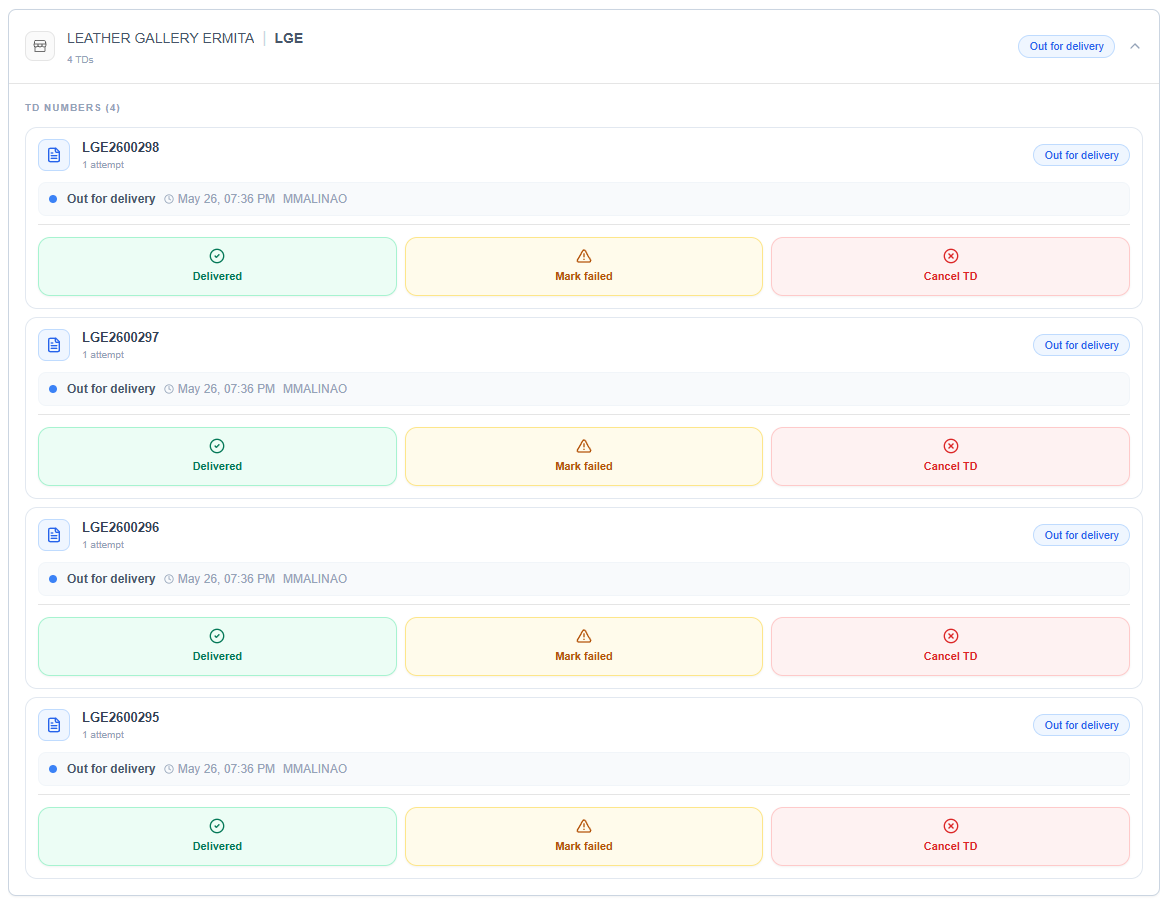
TD Cards — Updating Delivery Status
Each TD card shows the TD number, its current status, the attempt history, and action buttons. The available actions depend on the current status of the TD:
|
Status |
Color |
Meaning |
Next Actions |
|
Pending |
Gray |
Not yet dispatched |
Out for Delivery / Cancel TD |
|
Out for Delivery |
Blue |
Currently being delivered |
Delivered / Mark Failed / Cancel TD |
|
Failed |
Amber |
Delivery attempt was unsuccessful |
Re-attempt / Cancel TD |
|
Delivered |
Green |
Successfully delivered |
No further actions |
|
Cancelled |
Red |
Delivery was cancelled |
No further actions |
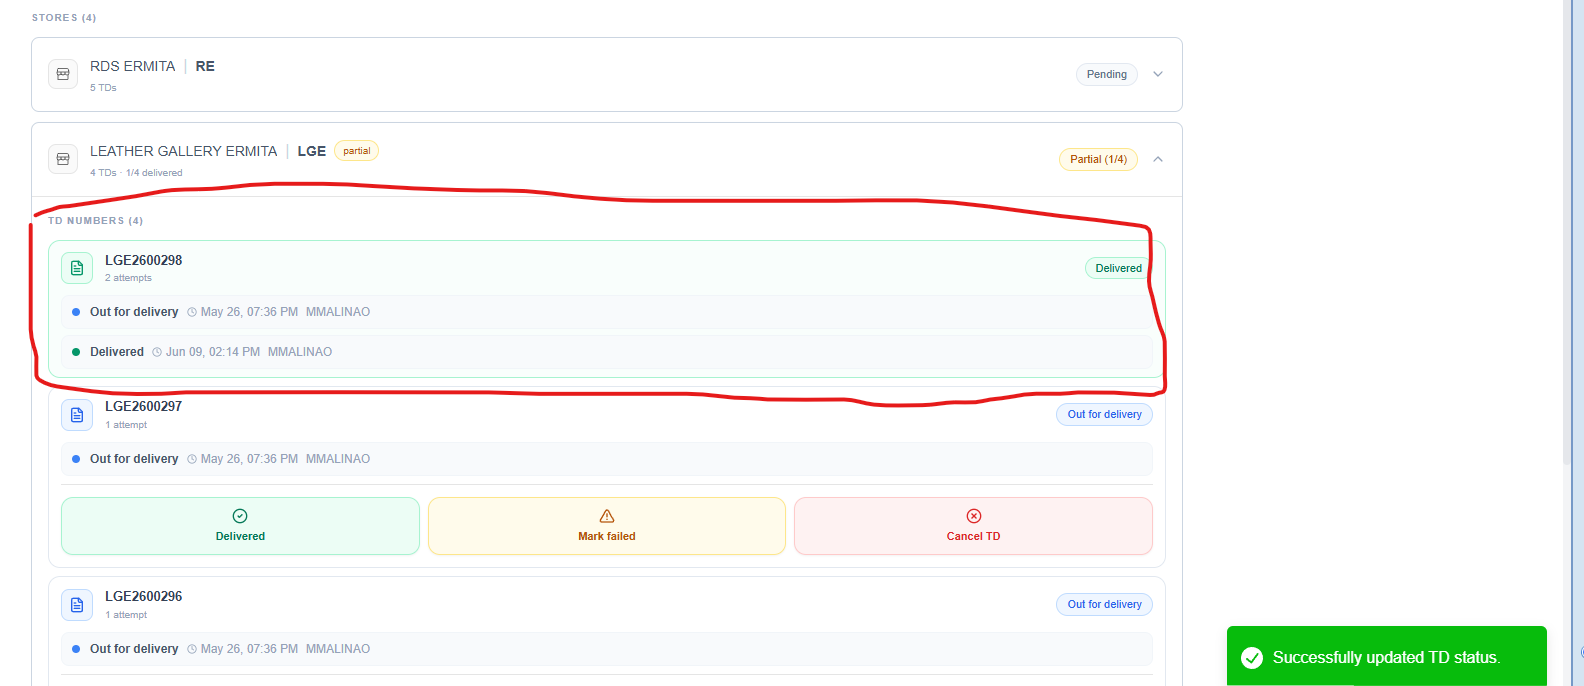
Marking a TD as Delivered
1. Expand the store and find the TD card.
2. Click the green Delivered button.
3. The status updates immediately.
Marking a TD as Failed
1. Click the amber Mark Failed button.
2. A reason field will appear. Enter a reason (e.g., “Store closed”, “Refused delivery”).
3. Click Confirm Failed to save.
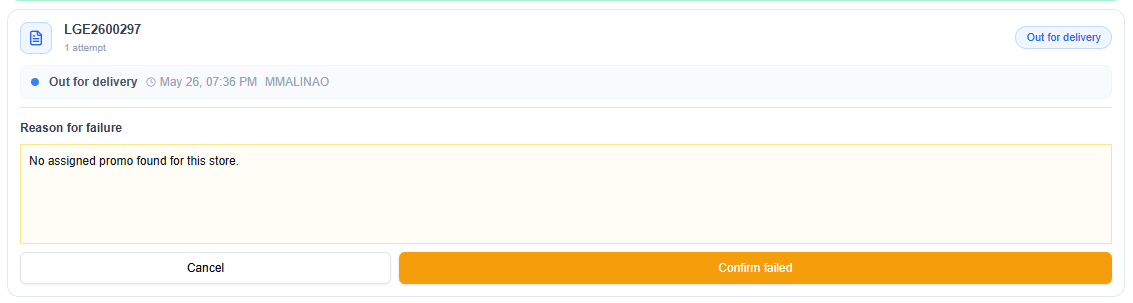
Note: A reason is required before you can confirm a failed delivery.
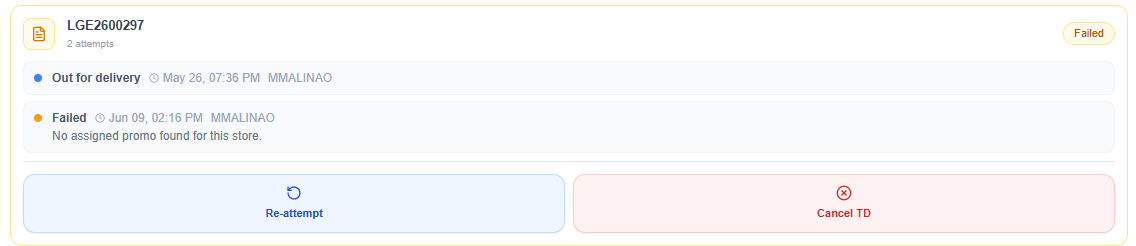
Re-attempting a Failed Delivery
1. On a TD with Failed status, click the blue Re-attempt button.
2. The status returns to Out for Delivery so a new attempt can be made.
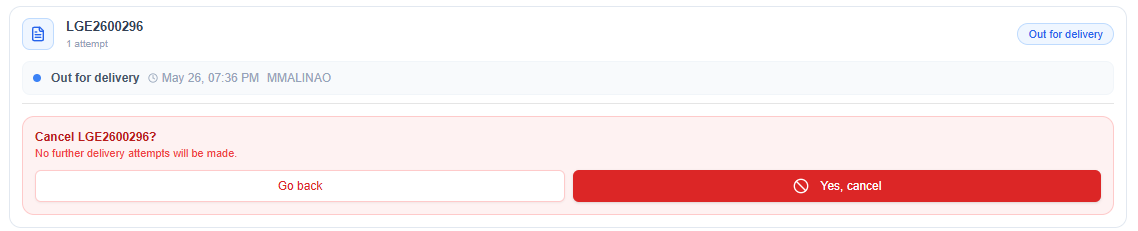
Cancelling a TD
1. Click the Cancel TD button (available from Pending, Out for Delivery, or Failed status).
2. A confirmation prompt will appear warning that no further attempts will be made.
3. Click Yes, Cancel to confirm, or Go Back to cancel the action.
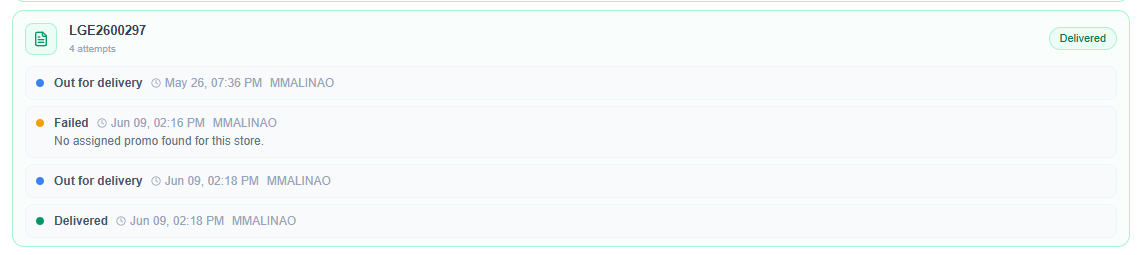
Attempt History
Each TD card shows a history of all delivery attempts below the TD number. Each history entry shows:
• The result of the attempt (e.g., Out for Delivery, Failed, Delivered).
• The date and time of the attempt.
• The username of the person who recorded the attempt.
• The reason provided, if the attempt was a failure.
Scan QR Tab — Starting a Delivery Run
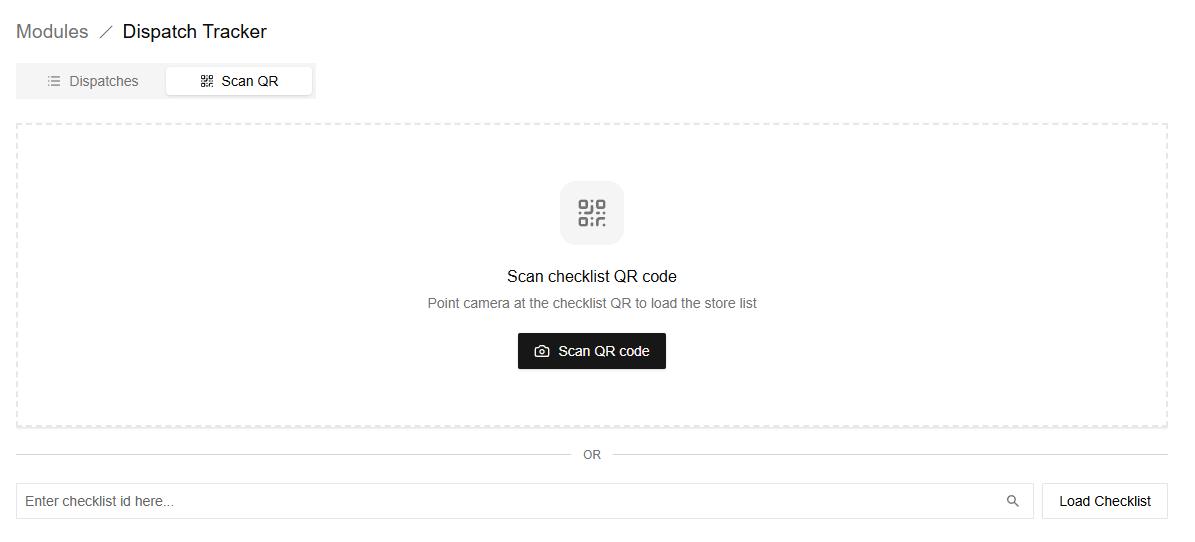
Use the Scan QR tab to begin a new delivery run from a printed checklist QR code. This tab has two ways to load a checklist:
Scanning with Camera
1. Click the Scan QR tab at the top of the page.
2. Click the black Scan QR Code button on the screen.
3. Allow the browser to access your camera when prompted.
4. Hold the printed checklist QR code in front of the camera and align it inside the white corner brackets on screen.
5. The system will automatically detect the QR code and load the checklist.
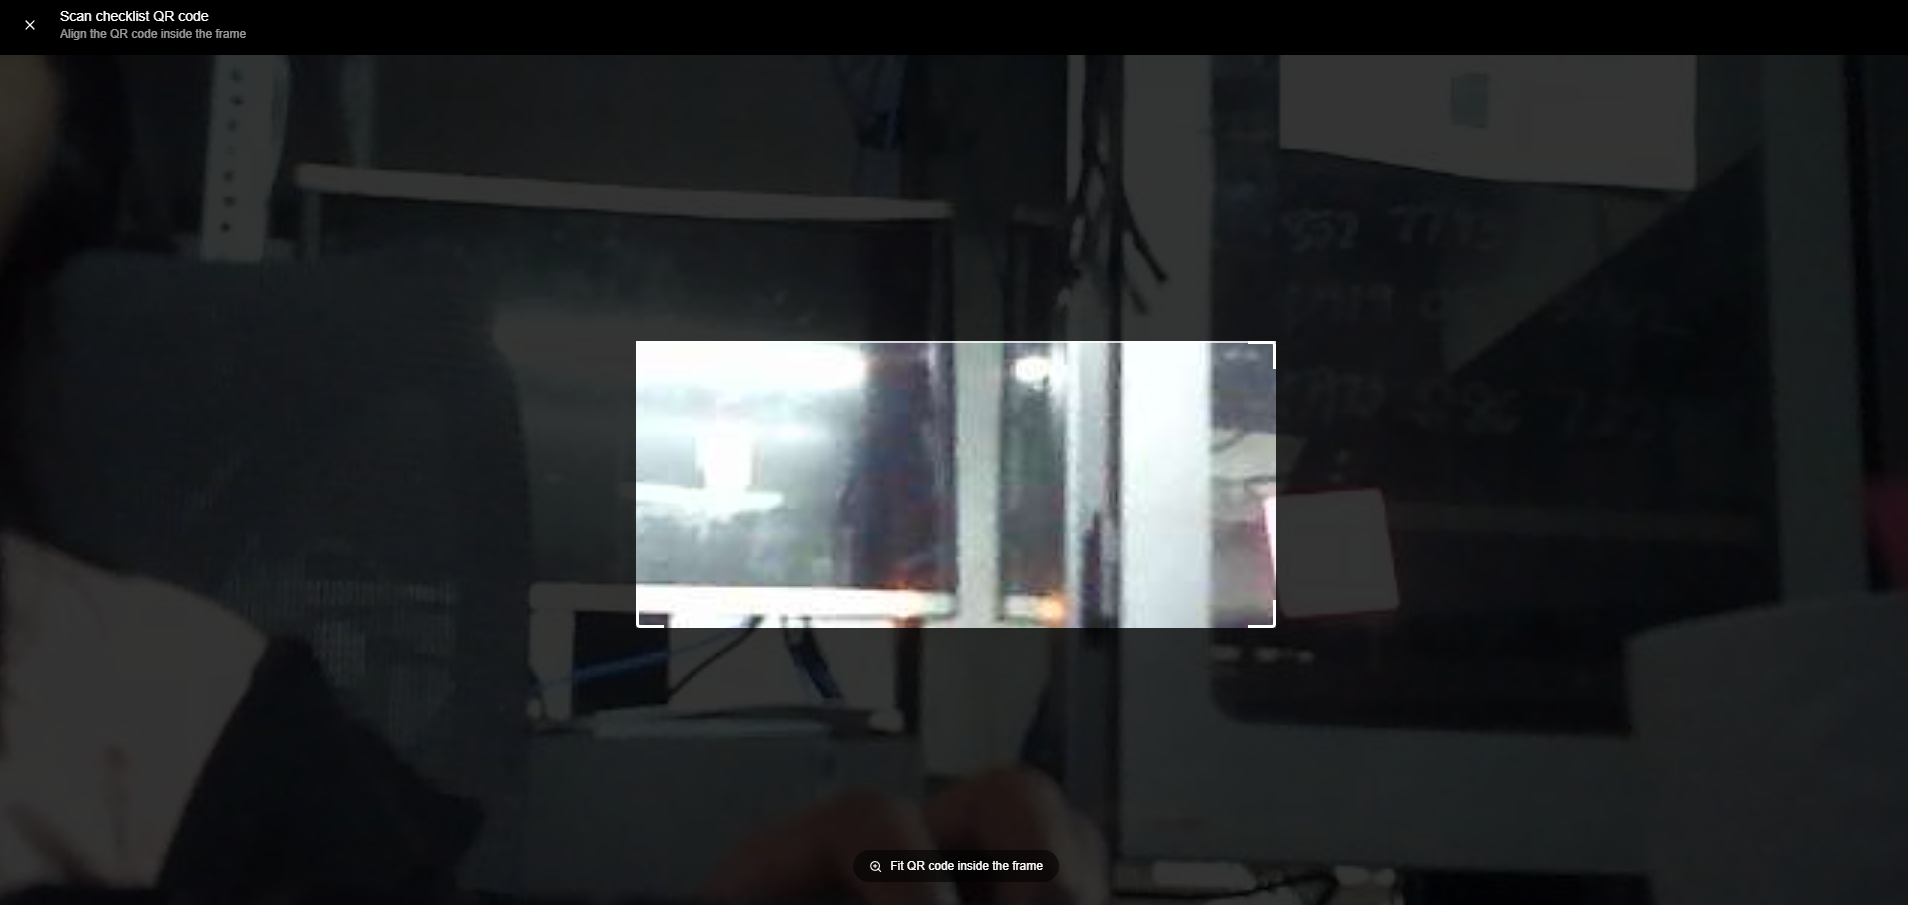
Note: If the camera does not open, check that your browser has permission to access the camera in your browser settings
Entering a Checklist ID Manually
1. Type the checklist ID number into the text field below the OR divider.
2. Press Enter or click the Load Checklist button.
3. The system will verify the ID and load the store list.

Note: If the system shows an error, the checklist ID either does not exist or has already been dispatched.
Selecting Stores for Delivery
After loading a checklist, you will see the list of stores in that checklist. By default, all stores are set to Include.
• Click any store row to toggle it between Include (green) and Skip (gray).
• Stores set to Skip will be set to Pending and will not be sent out for delivery.
• The counter at the bottom shows how many stores are selected.
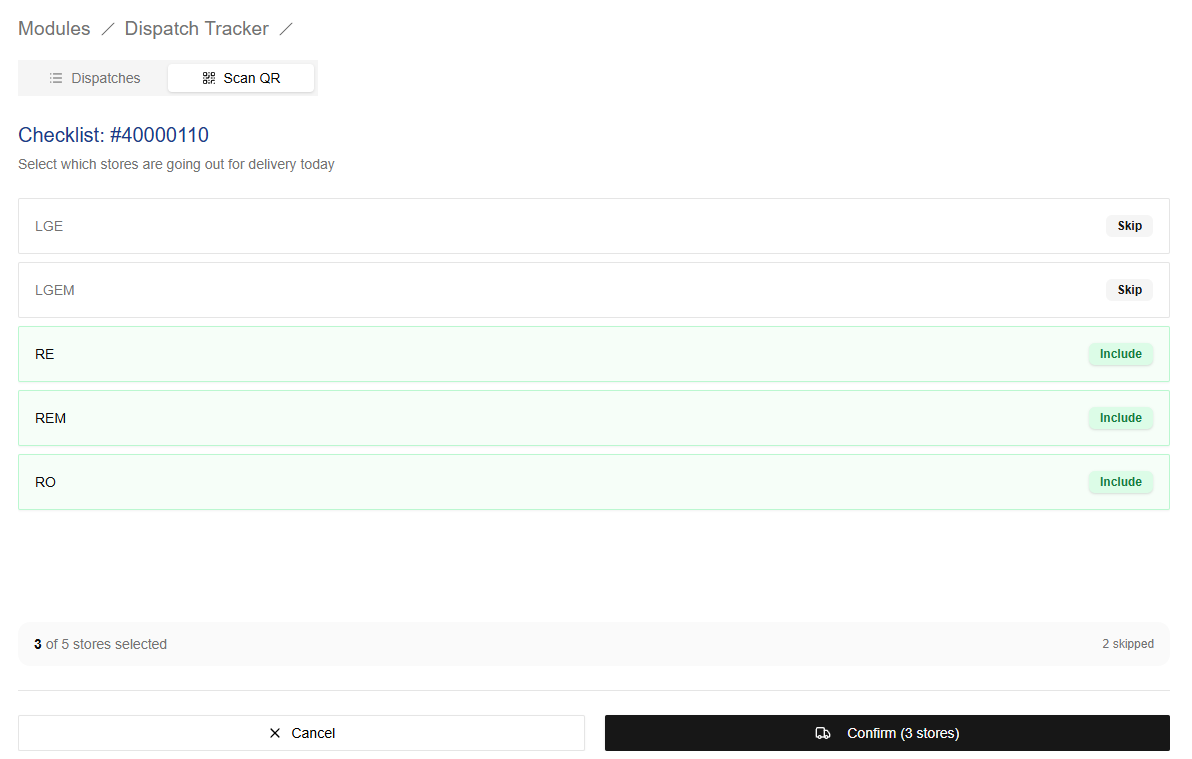
1. Review the store list and toggle any stores that should not go out today.
2. Click the Confirm button to start the delivery run.
3. The system creates the dispatch and takes you to the Dispatches tab.
Note: You cannot confirm a run with zero stores selected. At least one store must be set to Include.
Delivery Status Reference
TD Statuses
|
Status |
Color |
Meaning |
Next Actions |
|
Pending |
Gray |
Created but not yet sent out |
— |
|
Out for Delivery |
Blue |
Driver is currently delivering this TD |
Update when outcome is known |
|
Delivered |
Green |
TD was successfully received by the store |
Final status — no further action |
|
Failed |
Amber |
Delivery attempt was unsuccessful |
Re-attempt or Cancel |
|
Cancelled |
Red |
TD will not be delivered |
Final status — no further action |
Store-Level Statuses
|
Status |
Color |
Meaning |
Next Actions |
|
Pending |
Gray |
No TDs have been dispatched yet |
— |
|
Out for Delivery |
Blue |
At least one TD is out for delivery |
Update individual TDs |
|
Partial |
Amber |
Some TDs delivered, others still pending |
Update remaining TDs |
|
Delivered |
Green |
All TDs have been delivered |
Complete |
|
Failed |
Amber |
At least one TD failed, none delivered |
Re-attempt or Cancel TDs |
|
Cancelled |
Red |
All TDs have been cancelled |
Complete |
No comments to display
No comments to display